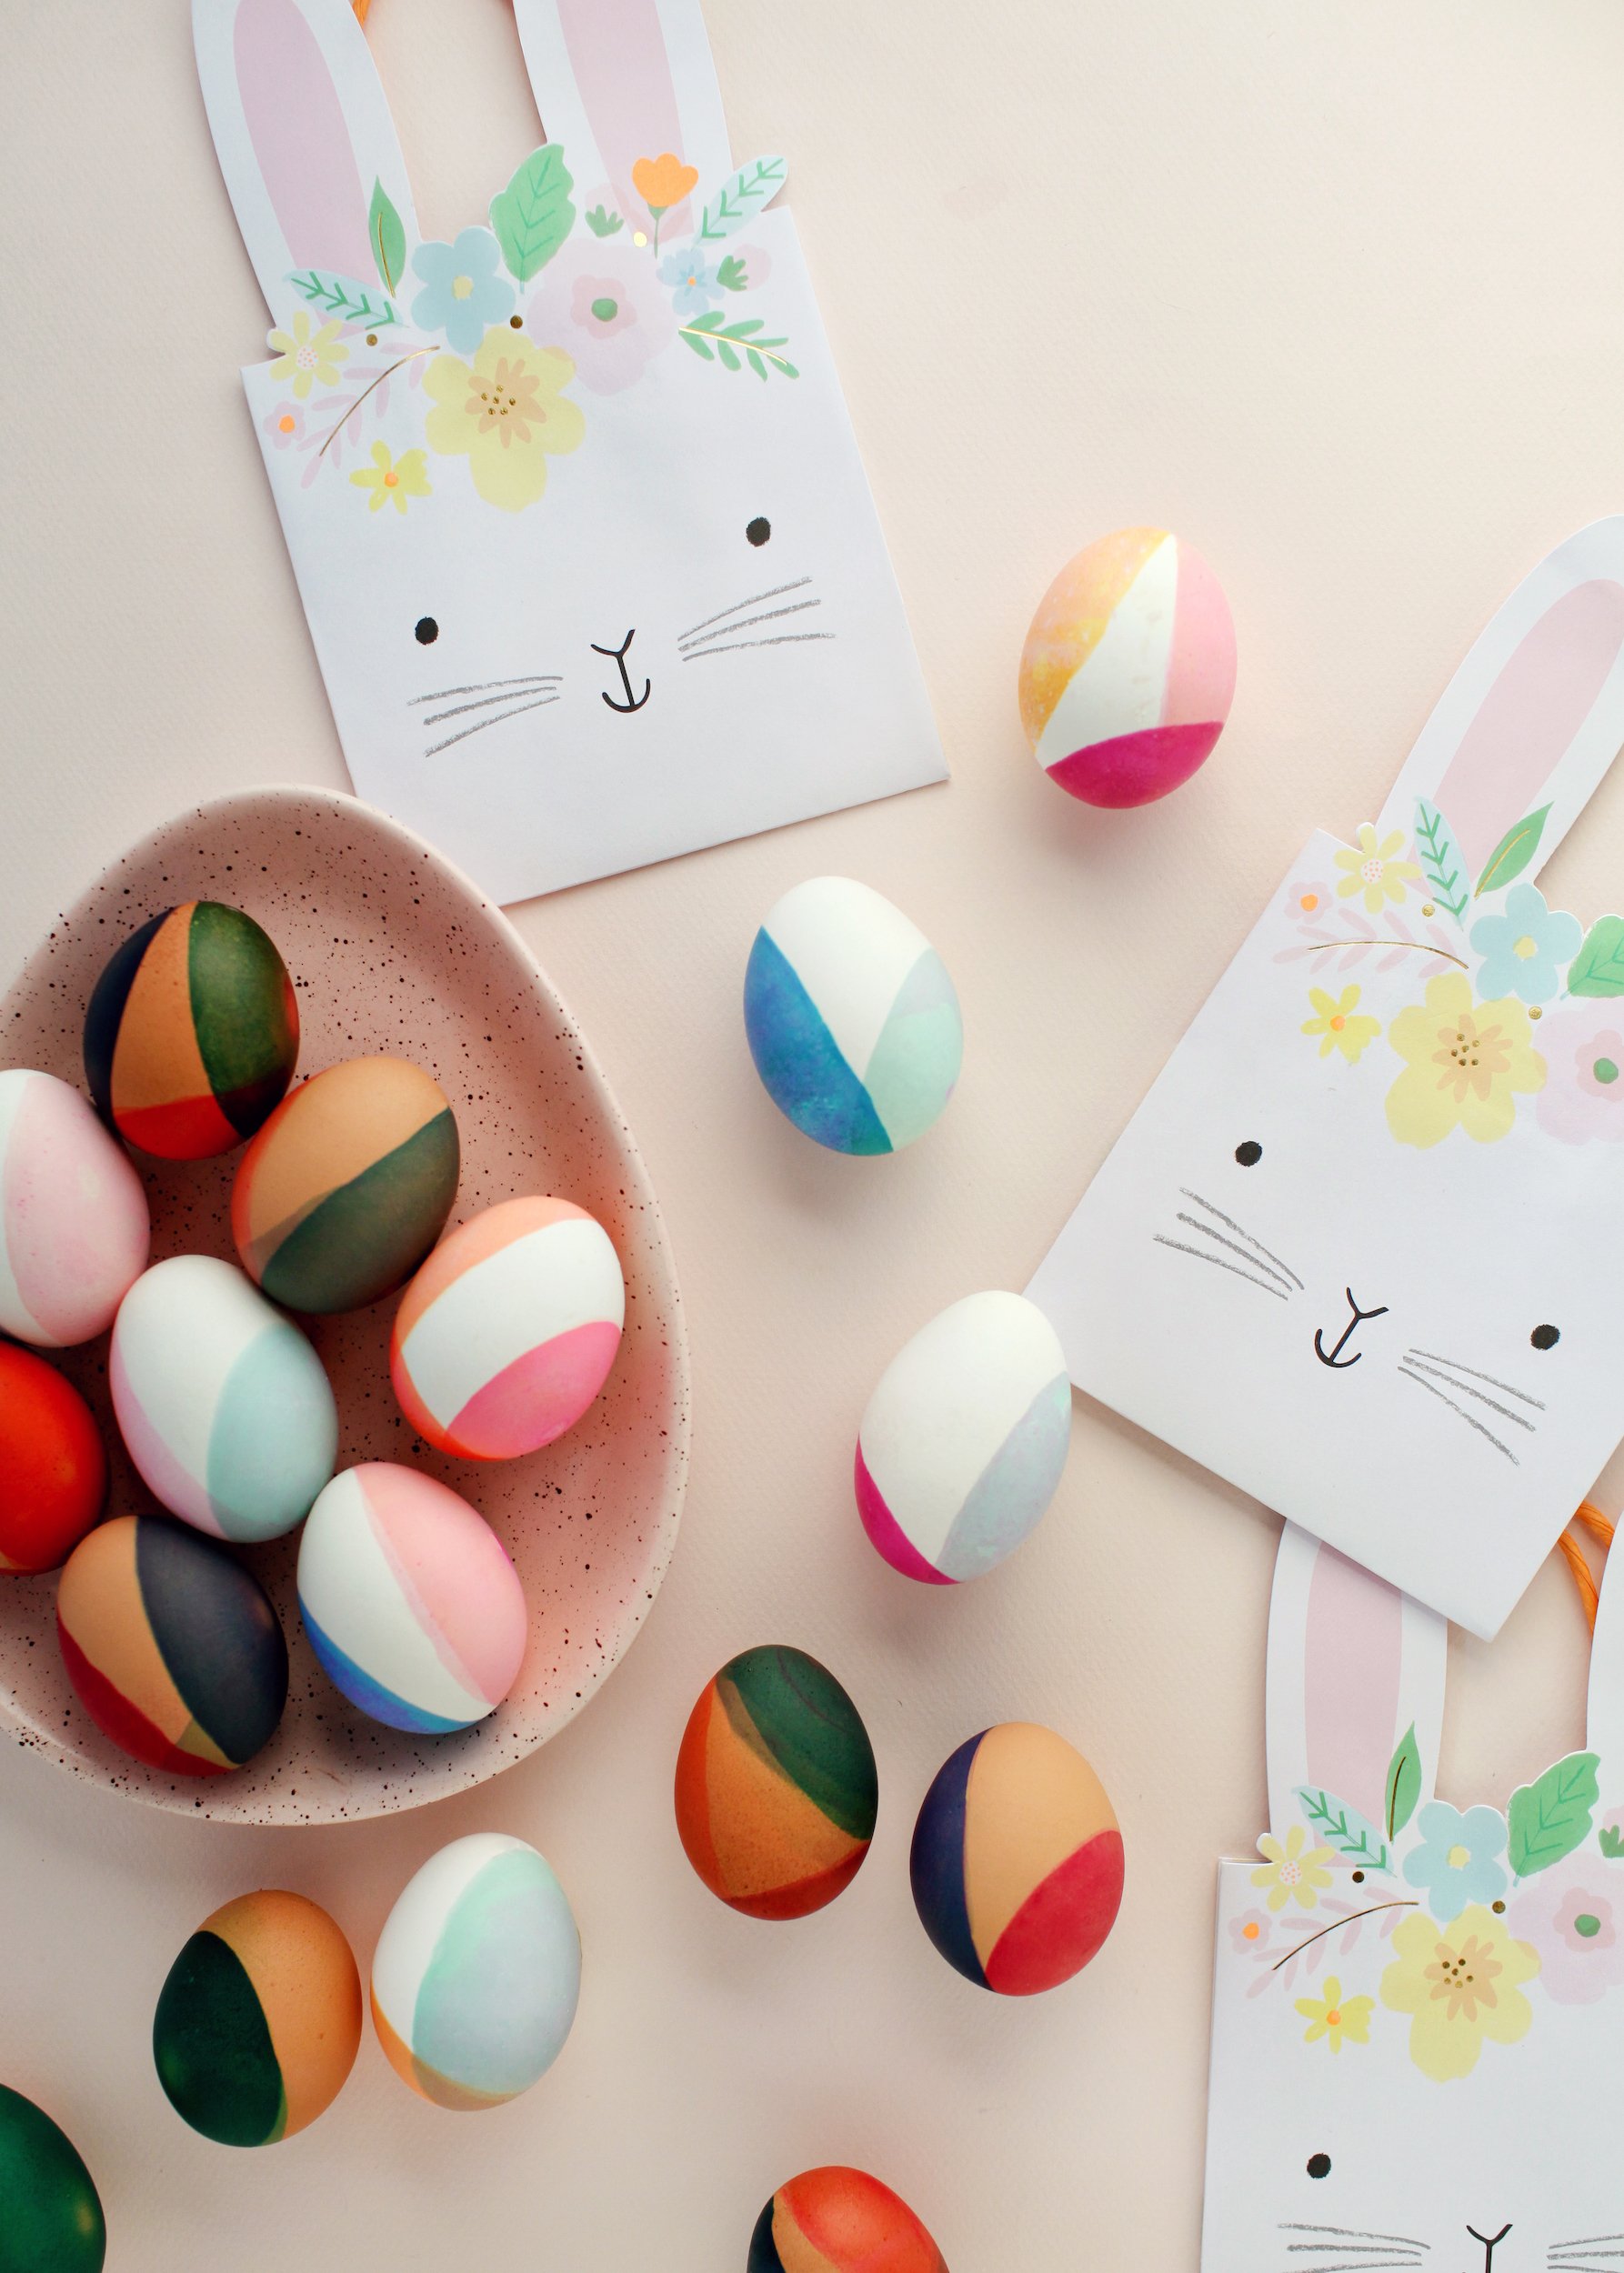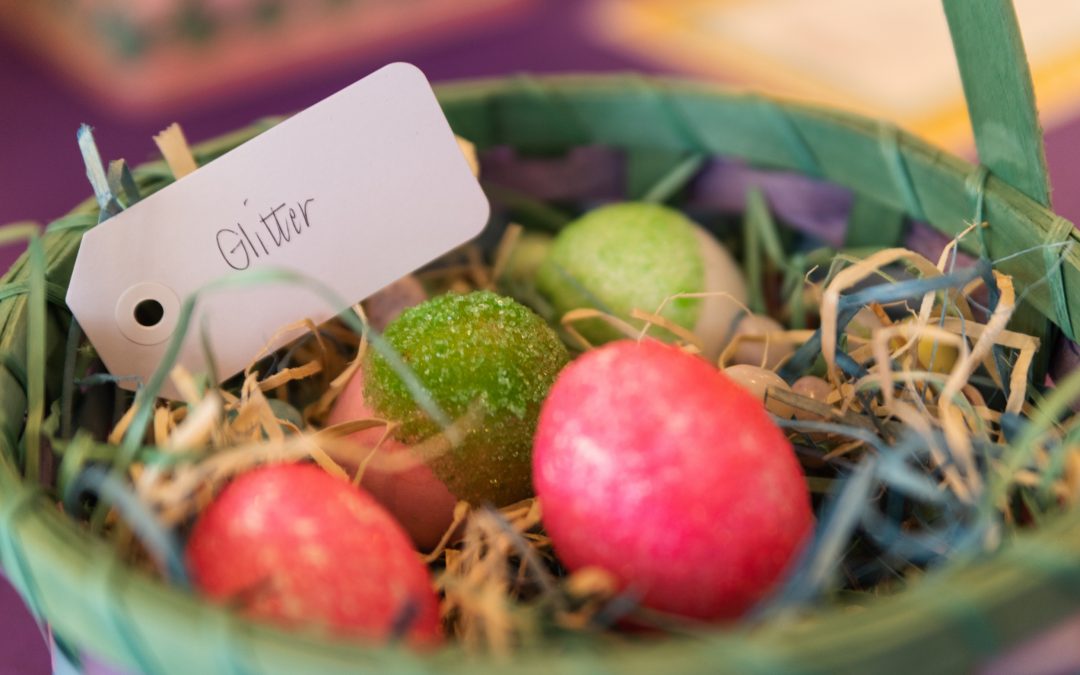
HOW TO DECORATE GLITTER EGGS
Glitter makes eggs even more incredible. Follow these steps and tips to make eggspeggtacular glitter eggs!
WHAT YOU NEED
- 12 hard-boiled EGGS, in shell
- Wide-rimmed, shallow plastic cups, 9 oz. or smaller
- White, washable school glue
- Glitter, various colors
- Paper plate, for drying
DIRECTIONS
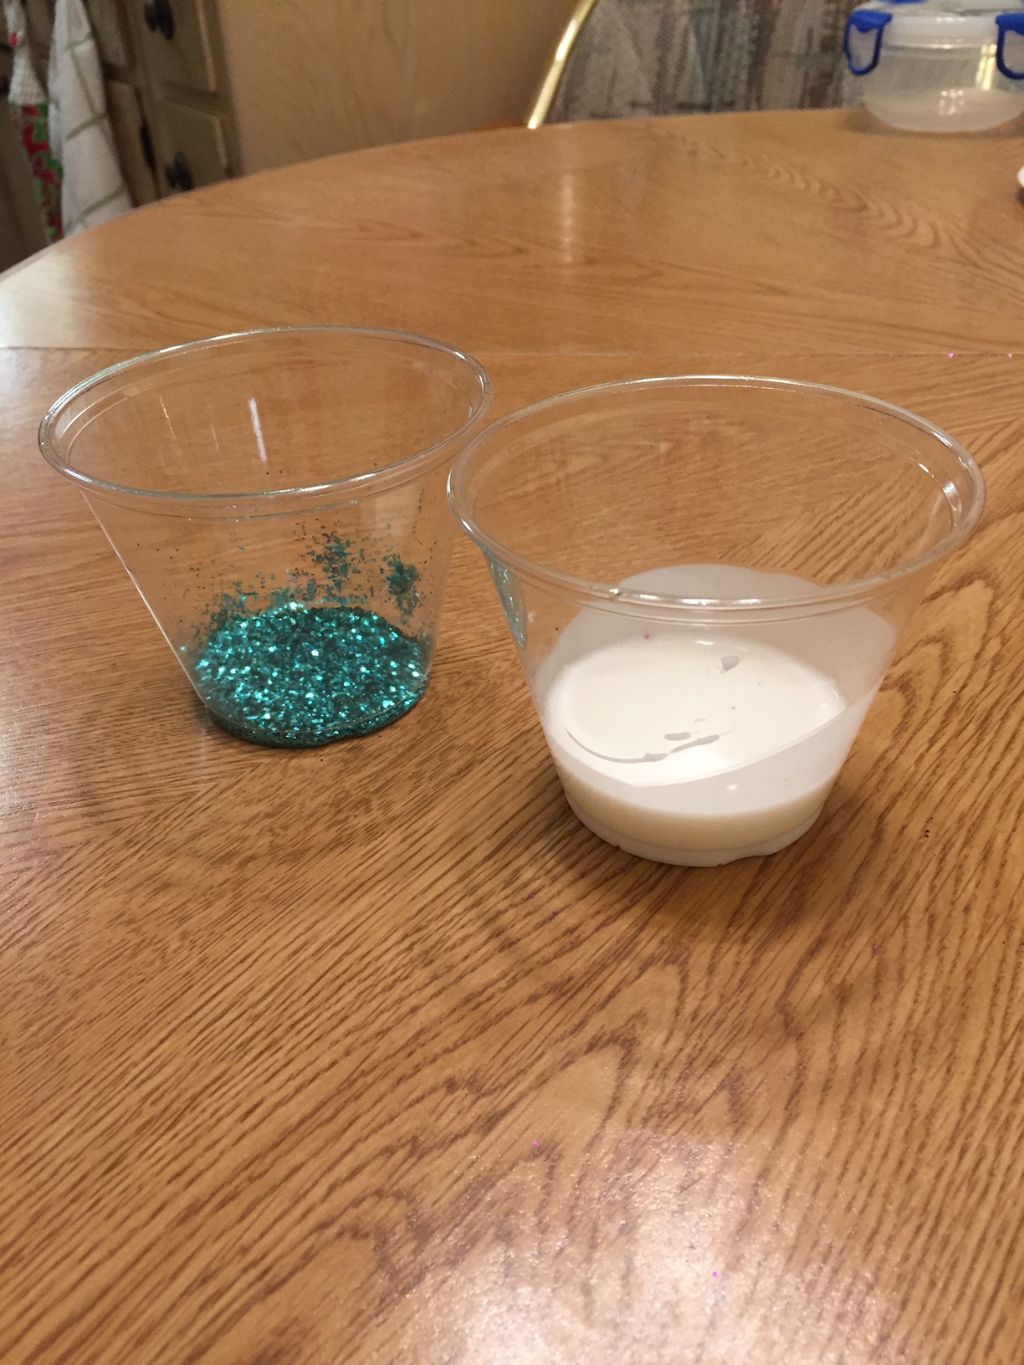
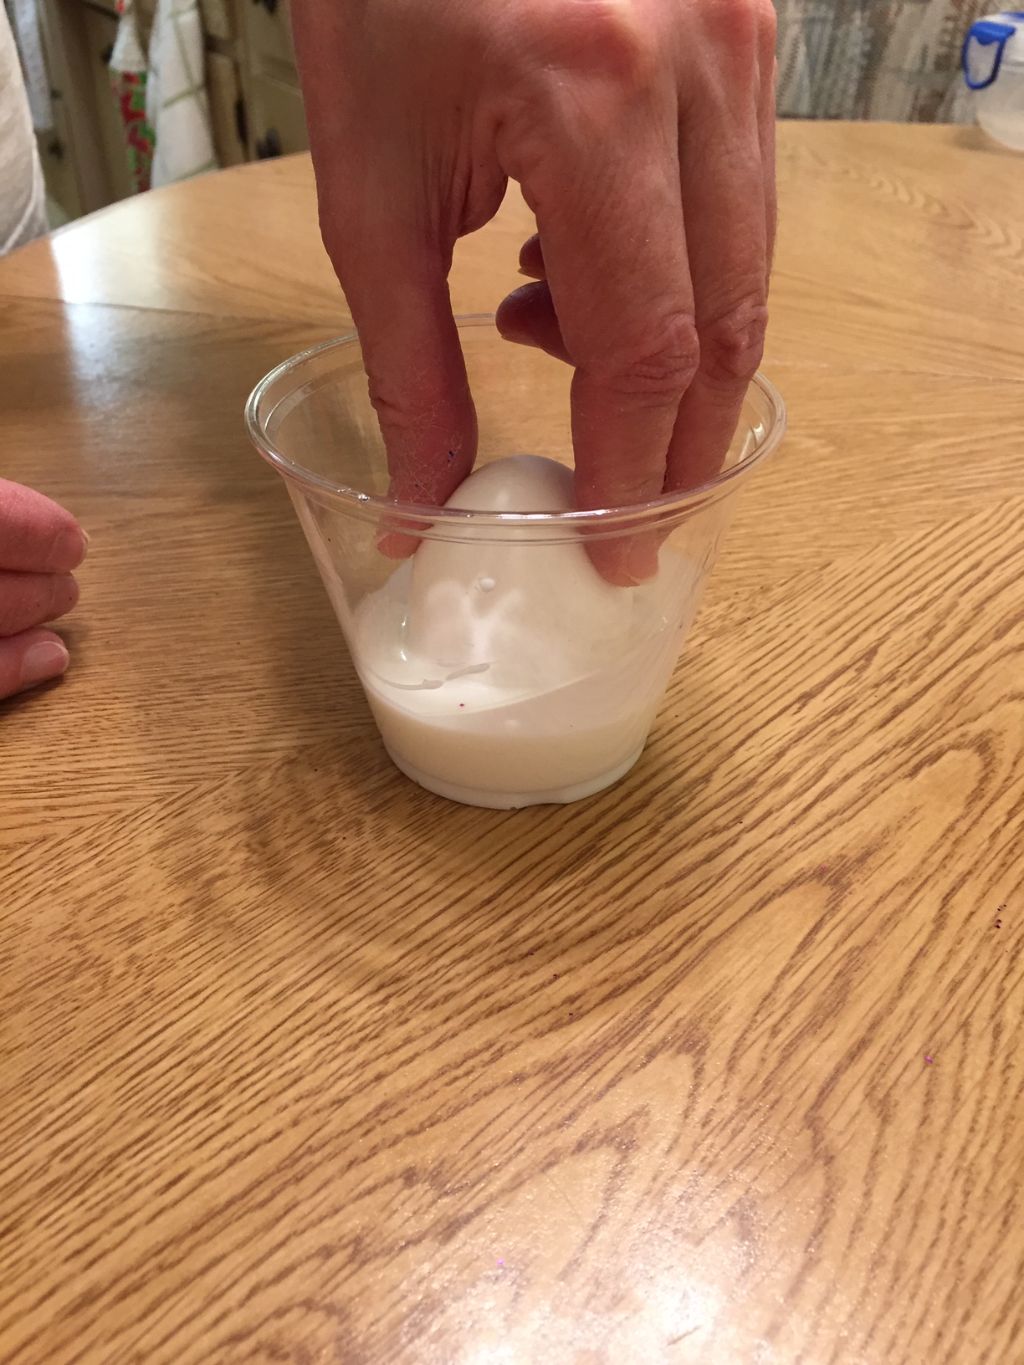
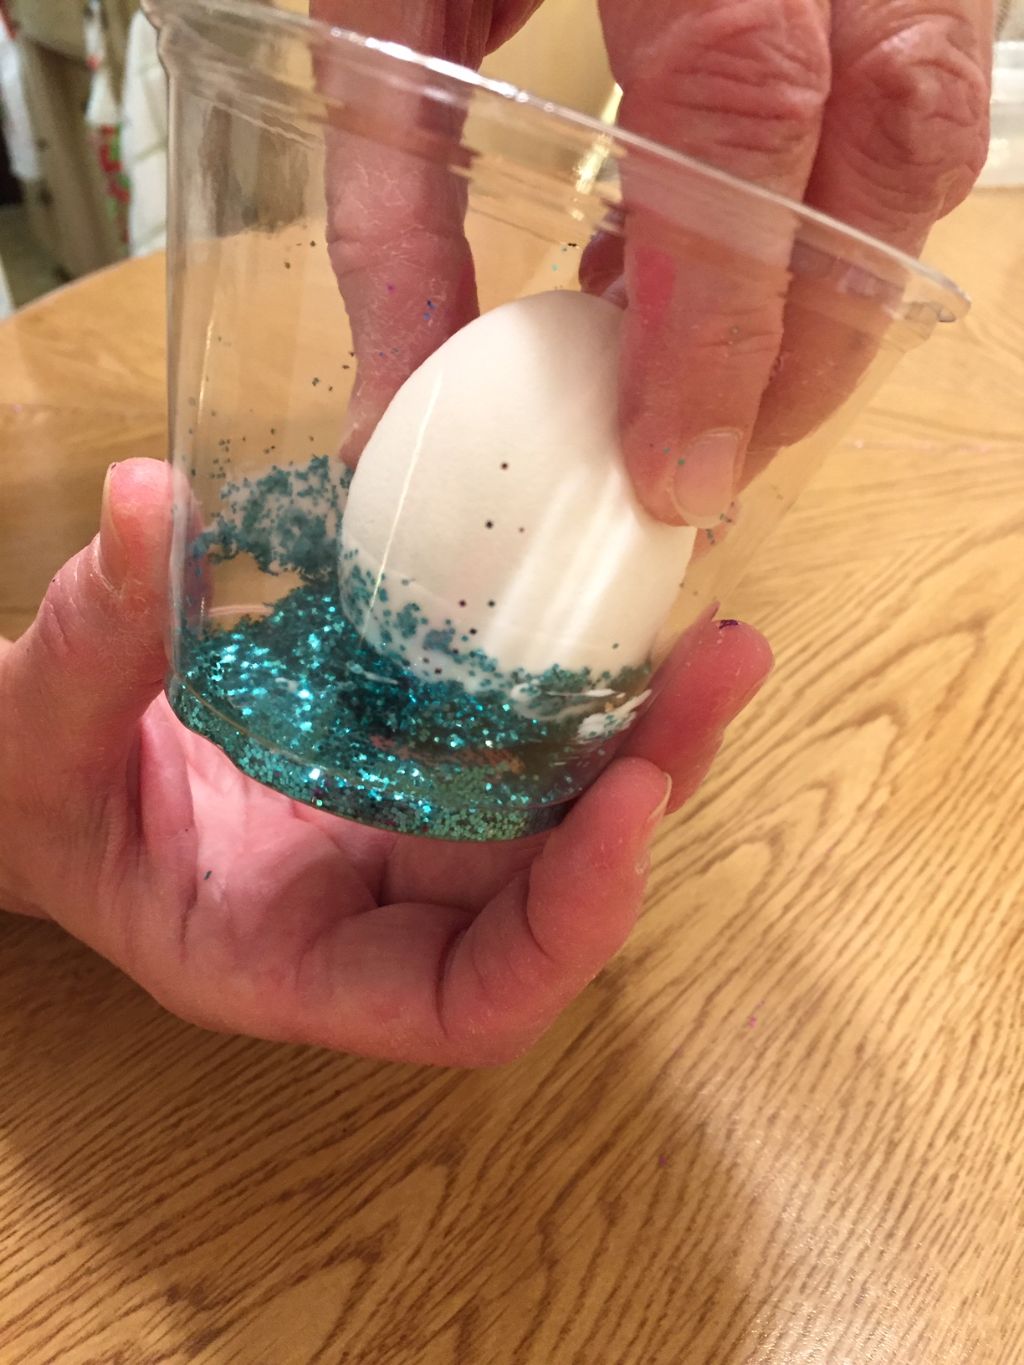
- FILL one of the cups with about ¾ inch of glue and each remaining cup with about ½ centimeter of glitter.
- DIP the rounded, bottom half of the egg in the glue. TURN egg slightly to get a good coating of glue. LIFT egg out of glue and let any excess drip off.
- TWIST bottom half of egg in glitter until an initial layer of glitter covers the glue. Use the sides of the cup to help turn the egg.
- SPRINKLE and PAT extra glitter onto the egg, using your fingers, to cover sparse areas and smooth out any clumps.
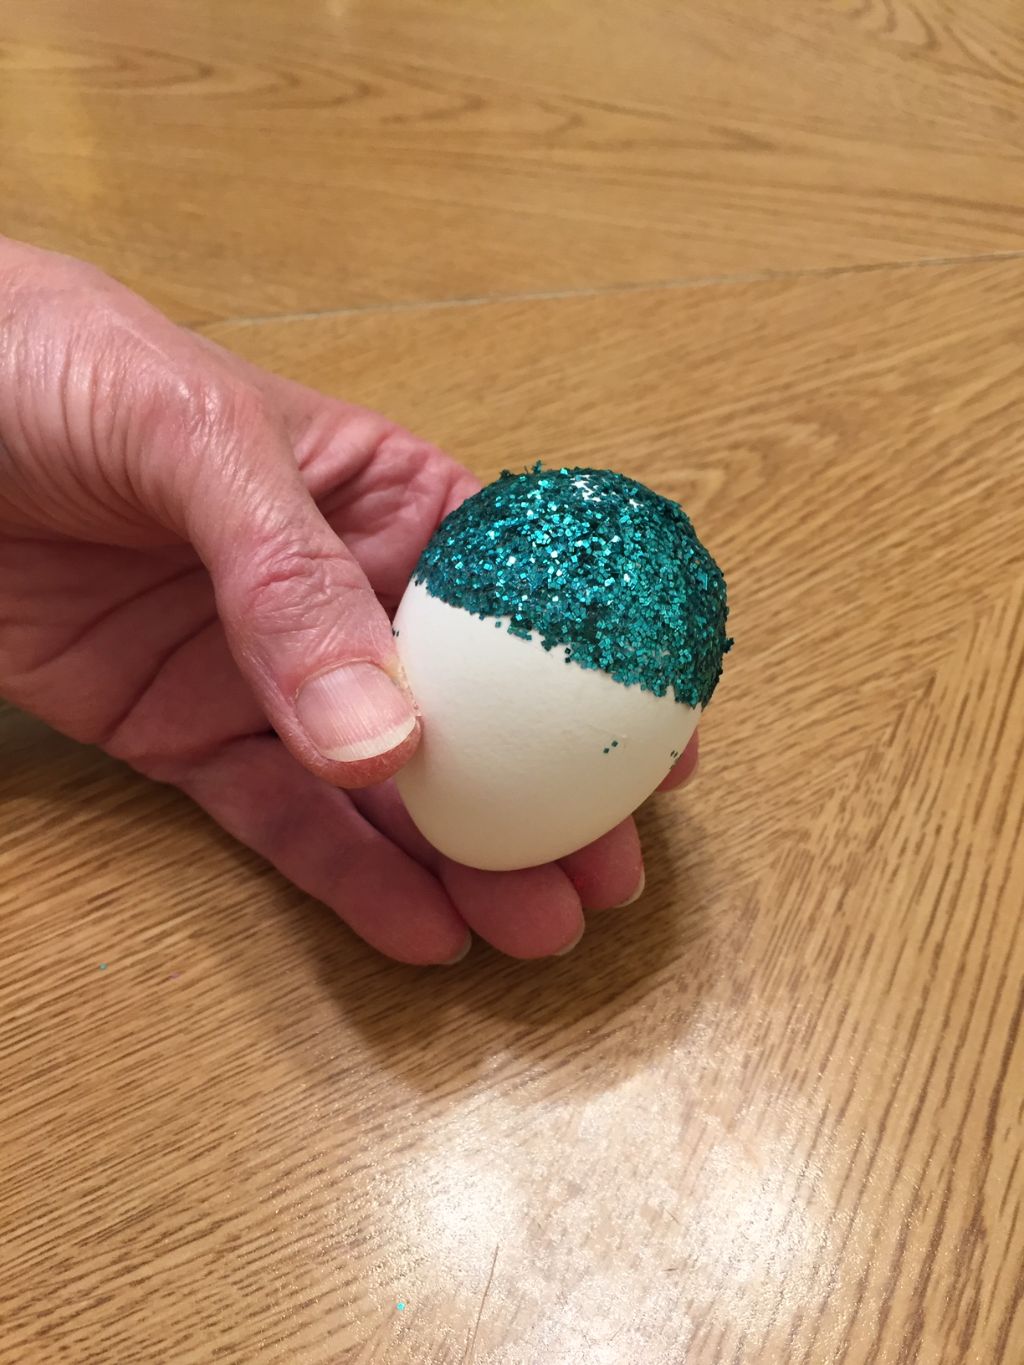
- STAND egg upright in cup until the glue is fairly dry. TRANSFER to a paper plate or similar surface to continue drying.
- REPEAT steps 2 through 5 for each shade of glitter, and watch your eggs shimmer.
INSIDER INFO
Use edible glitter! If you’re eggcited to eat your eggs, make sure to use edible glitter. Colored sanding sugar works well as “glitter” and is less expensive than edible glitter. We know the glitter goes on the shell — which you don’t eat — but you should always use food-safe decorating materials. You can find it at various locations, such as your local mass retailer, craft store or sites, like Layer Cake Shop.
Tip: To get a more even finish on your glitter eggs, stick a thin piece of washi tape around the circumference of each egg. When dipping, make sure glue and glitter cover about half of the washi tape. Once eggs are dry, peel off tape and enjoy!